


In this tutorial, I will show you the steps I took to Create Awesome Black and White Abstract Text Effect in Photoshop. The main focus of this tutorial is the use of layer masking techniques, plus some interesting drawing skills. Have a try!
This is an intermediate tutorial so some steps can be tricky – if you’re having difficulty with it, I suggest you go to the basic section of PSD Vault and practice those tutorials first, then come back and do this one.
Here is a preview of the final effect I have for this tutorial: (Click to Enlarge)
Ok Let’s get started!
To complete this tutorial, you will need the following stock:
Font
Cloud Brush
Smoke Brush
Dirt Brush
Step 1
Create a new document sized 720*960px, add a Gradient Fill layer on top with a light grey gradient:
Use the cloud brush to paint some cloud on another layer, mainly around the edge: (don’t set the opacity too high, a subtle effect will do)
Duplicate this cloud layer once, compress it down via Free Transform tool and remove the edge with a soft eraser – this will form some ground texture:
Step 2
Use the font you downloaded, type one letter on the centre of the canvas:
Now add a layer mask on the text layer – use a combination of hard and soft eraser to create some abstract pattern on the mask:
This step can be a little tricky. You don’t need to create the same pattern as I have, but the practice the use of soft and hard brush is important and may benefit you in the future.
and here is the effect after the masking:
Paint some shadow under the text via a soft brush, use Free Transfrom tool to compress it down
Create a new layer under the text layer – we can use the dirt brush you downloaded to paint some dirt texture on the text: (reduce the brush size first)
Also paint some dirt on the top left of the text:
Also use the smoke brush to paint some smoke behind the text:
and here is the effect so far:
Step 3
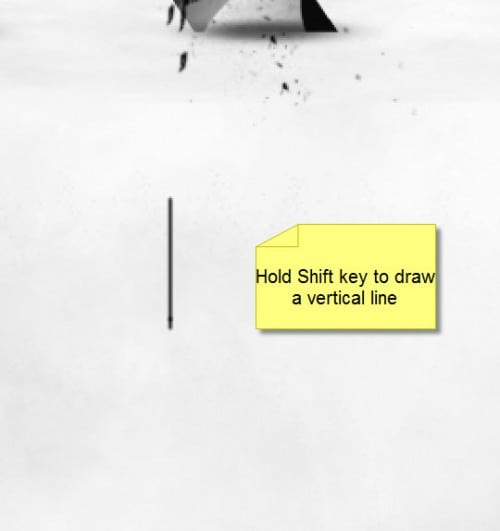
Now we can draw some lines around the text. Let’s grab a 3px hard brush first:
Now if you hold down the Shift key, and draw at the same time, you will find that you can draw a vertical (or horizontal line) through this way:
Now hold your shift key and start painting some random vertical lines around the text: (you can make a brush for it, but I’d rather you go through this painting process manually)
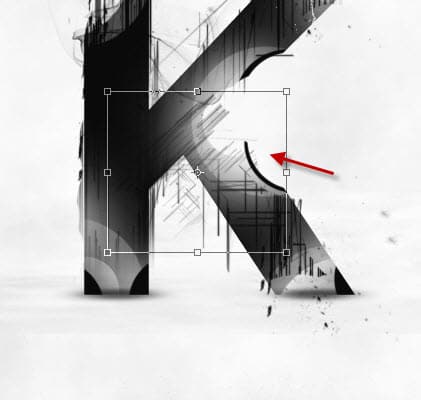
Duplicate this line layer once and resize it to a smaller scale, rotate it 45 degree to the right and place it to the centre of the text:
and here is the effect so far:
Hope you enjoy this tutorial and find it useful! Till next time, have a great day!
samedi 12 mars 2011
Create Awesome Black and White Abstract Text Effect in Photoshop
Posted by SigmaTuto on 13:32. - No comments


0 commentaires:
Enregistrer un commentaire